
Home Cinema Setup: A Complete Guide From Room Assessment to Picture Calibration

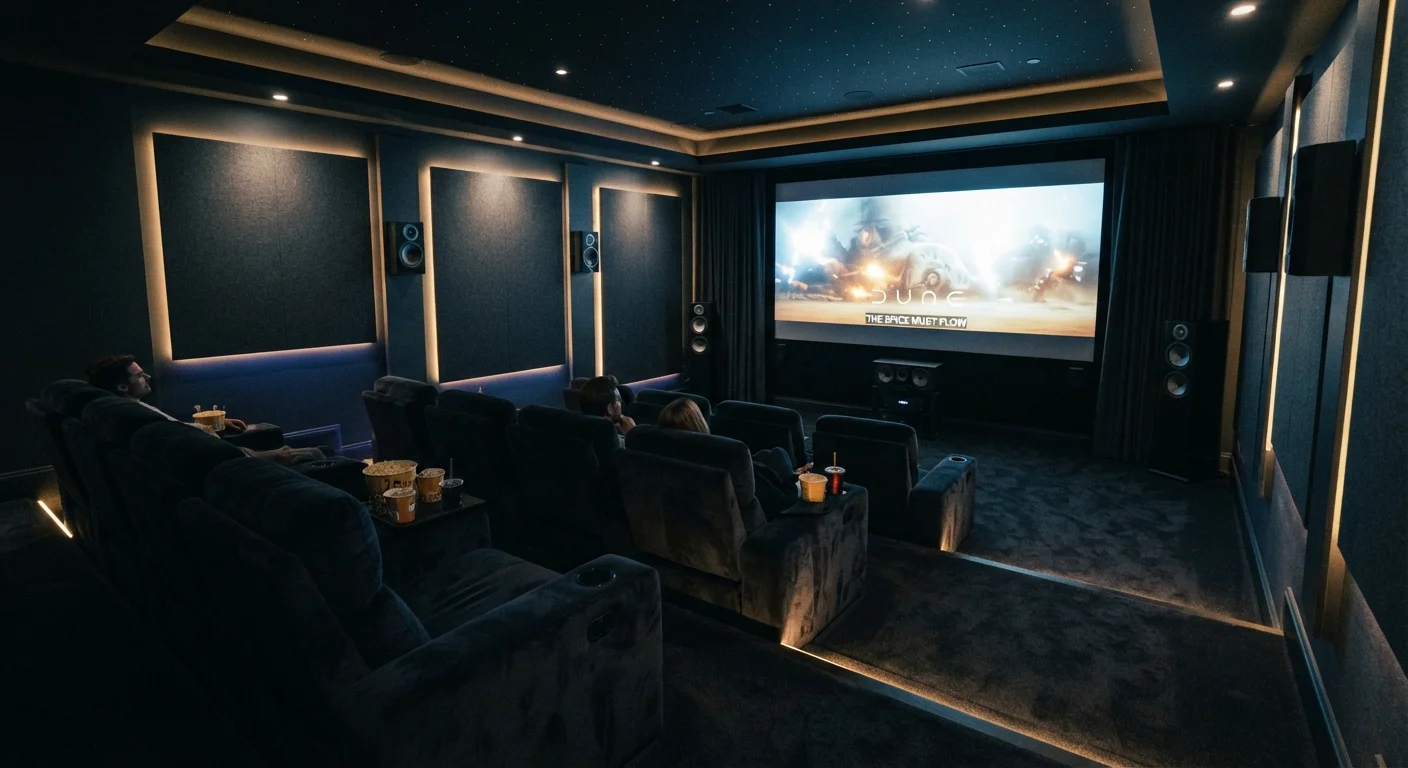
Key Takeaways
- Room dimensions and light control directly determine which display technology will work best.
- Screen size should be chosen based on viewing distance, not room size alone.
- Audio format support depends on your receiver and speaker configuration, not just the source device.
- HDMI version matters — older cables can bottleneck 4K HDR and high frame-rate content.
- Picture calibration significantly improves image quality and is often overlooked by new owners.
- Plan your budget around the room's biggest weaknesses first, not the flashiest components.
Start With the Room: Dimensions, Light, and Acoustics
Before selecting any hardware, assess the space itself. The room's dimensions, ambient light levels, and surface materials have more impact on your final experience than almost any component you buy.
Measure the room's length, width, and ceiling height. A viewing distance of roughly 1.5 to 2.5 times the screen's diagonal width is a widely cited starting point for comfortable viewing — though personal preference and vision vary. Longer rooms favor projector setups; shorter, brighter rooms tend to suit large-screen TVs better.
Light control is critical. Windows without blackout treatments will wash out a projected image entirely and reduce the perceived contrast of any display. Identify light sources — natural and artificial — and plan how they'll be managed during viewing sessions.
Acoustics are frequently underestimated. Hard, parallel walls create flutter echo (a rapid, repeating slap of sound), while heavily furnished or carpeted rooms absorb sound more evenly. You don't need professional acoustic panels to improve the situation — bookshelves, rugs, upholstered furniture, and heavy curtains all contribute meaningfully. If the room sounds noticeably echoey when you clap once, that will affect dialogue clarity during playback.
Test Acoustics Before You Buy Equipment
Clap sharply once in the empty room and listen carefully. A long reverb tail or a rapid flutter suggests you'll need to address surfaces before optimizing your speaker setup. Fixing the room first means every speaker and display purchase lands in an environment where it can actually perform as intended.
Choosing Your Display: Projector vs. TV
The two main display paths — large-screen TV or front-projection system — each have distinct trade-offs worth understanding before committing.
Large-screen TVs (typically 65 inches and above) work in lit rooms, require no throw distance, and offer self-contained simplicity. Modern panel technologies such as OLED deliver exceptional contrast through per-pixel light control, while LED-backlit LCD panels have improved significantly in brightness and color volume. For a detailed breakdown of panel types and resolution terminology, see our display specs guide and our TV resolution explainer.
Projectors can achieve screen sizes well beyond 100 inches at relatively lower cost per inch of screen area, but they require a dark room and a suitable throw distance (the gap between the lens and the screen). Short-throw and ultra-short-throw projectors reduce this requirement significantly but come at higher cost.
Screen gain — a measure of how much light a projector screen reflects toward the viewer — matters for projector setups. A higher gain screen concentrates light forward, improving brightness in less-than-perfect rooms, but narrows the ideal viewing angle.
~1.5–2.5×
Recommended viewing distance relative to screen diagonal
This widely referenced range reflects guidance from display industry organizations including the Society of Motion Picture and Television Engineers (SMPTE).
70%+
Share of cinematic dialogue carried by the center channel
Audio engineers and home theater designers consistently note that the center channel handles the majority of on-screen dialogue in surround-mixed content.
Audio Formats and Speaker Placement
Audio quality is at least as important as picture quality for a cinematic experience, yet it's where many setups fall short. Understanding the core audio formats helps you make sense of what your equipment actually supports.
Dolby Atmos and DTS:X are the two dominant object-based surround formats. Unlike traditional channel-based audio (5.1 or 7.1), object-based audio places sounds in three-dimensional space, including overhead. Realizing the full benefit requires ceiling or upward-firing speakers in addition to conventional surround placement.
A basic 5.1 setup — center channel, left and right front, two surround speakers, and a subwoofer — delivers a substantial upgrade from any stereo or soundbar configuration. The center channel handles the majority of on-screen dialogue, so its quality and placement (ideally at screen height, aimed at listening position) significantly affect clarity.
Subwoofer placement is flexible but matters. Corner placement generally maximizes low-frequency output; experimenting with position before permanent installation is worthwhile, as room modes (standing waves created by room dimensions) cause bass to pile up or drop out at specific locations.
Run the "subwoofer crawl" before fixing your sub's position: place it at your primary listening seat, play bass-heavy content, and slowly walk the room's perimeter until you find the spot with the smoothest, most even bass response — then install the subwoofer there.
Room modes cause bass frequencies to reinforce or cancel at different positions. The crawl method is a practical, tool-free way to identify the optimal placement before any permanent installation.
Set your AVR's speaker size to "Small" for all channels, even if your speakers are physically large, and let the receiver redirect bass frequencies to the subwoofer via the crossover.
Directing low frequencies to a dedicated subwoofer rather than full-range speakers reduces distortion, protects drivers, and typically delivers tighter, more accurate bass reproduction.
Connecting Everything: HDMI, Sources, and Signal Flow
Modern home cinema systems route video and audio through an AVR (audio/video receiver) or a pre-amplifier/processor. The receiver decodes audio formats, amplifies speaker channels, and passes video to the display — all via HDMI.
HDMI version compatibility is a common source of confusion and a real technical constraint. HDMI 2.0 supports 4K at 60Hz with HDR; HDMI 2.1 adds bandwidth for 4K at 120Hz and 8K signals. If your source device, receiver, and display don't all share compatible HDMI versions on the relevant ports, you may lose features without any error message. Our HDMI versions reference guide explains exactly what each version supports.
Common sources include Ultra HD Blu-ray players, streaming devices, and gaming consoles. Each has different audio and video output capabilities. An AVR positioned centrally in the signal chain simplifies cable management and ensures consistent audio decoding regardless of source.
eARC Enables Full-Quality Audio Passthrough
If you connect your display directly to an AVR using eARC (available on HDMI 2.1 ports), the TV can pass lossless audio formats — including Dolby TrueHD Atmos — back to the receiver from apps running on the display itself. Without eARC, you may receive a compressed version of the audio. Verify that both your display and receiver support eARC on their respective HDMI ports before assuming this feature is active.
Picture Calibration: Getting the Image Right
Factory display settings are optimized for showroom brightness, not home viewing. Calibration adjusts core image parameters so what you see matches how content was graded by filmmakers.
The most impactful adjustments for most users are: selecting the correct picture mode (typically a "Cinema," "Movie," or "Filmmaker" preset), reducing backlight or OLED brightness to a comfortable level for your room's ambient light, and disabling motion-smoothing — sometimes called "soap opera effect" — which makes cinematic content look like a low-budget video.
Professional calibration using a colorimeter and calibration software (such as Calman or HCFR) yields the most accurate results by measuring actual light output and adjusting the display's internal color management system. This is a meaningful step for enthusiasts. For most consumers, however, a validated preset like Filmmaker Mode (now supported across many major display manufacturers) delivers a significant improvement without any manual adjustment.
HDR (High Dynamic Range) deserves specific mention. HDR content is mastered to a peak brightness standard, and displays must be capable of meeting — or gracefully tone-mapping — that standard to render it correctly. Enabling HDR on a display incapable of meaningful peak brightness can actually reduce perceived picture quality compared to a well-set-up SDR image.
Calibrate After Every Major Change
Replacing a display, changing the room's lighting conditions, or upgrading an AVR can all shift how your image looks and sounds. Picture calibration is not a one-time setup step — it should be revisited whenever significant changes are made to the room or system. Many display settings are also reset to factory defaults during firmware updates, so it's worth periodically confirming your preferred settings are still active.
Budgeting and Prioritization
A home cinema project can span a wide range of investment levels. The most common mistake is concentrating budget on a premium display while underinvesting in audio and room treatment — the two factors that most affect perceived immersion.
A practical prioritization framework: address the room's acoustic and light-control deficiencies first, then allocate toward an audio system that fills the space adequately, and finally invest in the display. A capable mid-range display in a well-treated, well-controlled room consistently outperforms a flagship panel in an acoustically poor, light-contaminated one.
If managing the overall project costs is a concern, applying disciplined planning principles — similar to those covered in our personal budgeting guide — can help you phase the build over time without overextending.
Home cinema also intersects with broader smart home decisions around control systems, lighting automation, and network infrastructure. If you're considering expanding beyond the cinema room itself, our smart home builder's guide covers the foundational decisions worth understanding before you start connecting devices.
Filmmaker Mode Specification
The UHD Alliance's Filmmaker Mode standard explains what the preset preserves and why it matters for accurate cinematic playback on consumer displays.
HCFR Colormeter Software
A free, open-source display calibration application used alongside a colorimeter probe to measure and adjust white balance, gamma, and color accuracy on consumer displays.
AVS Forum Home Theater Planning
A long-running enthusiast community with dedicated threads on room design, equipment setup, and calibration troubleshooting — useful for specific technical questions.